
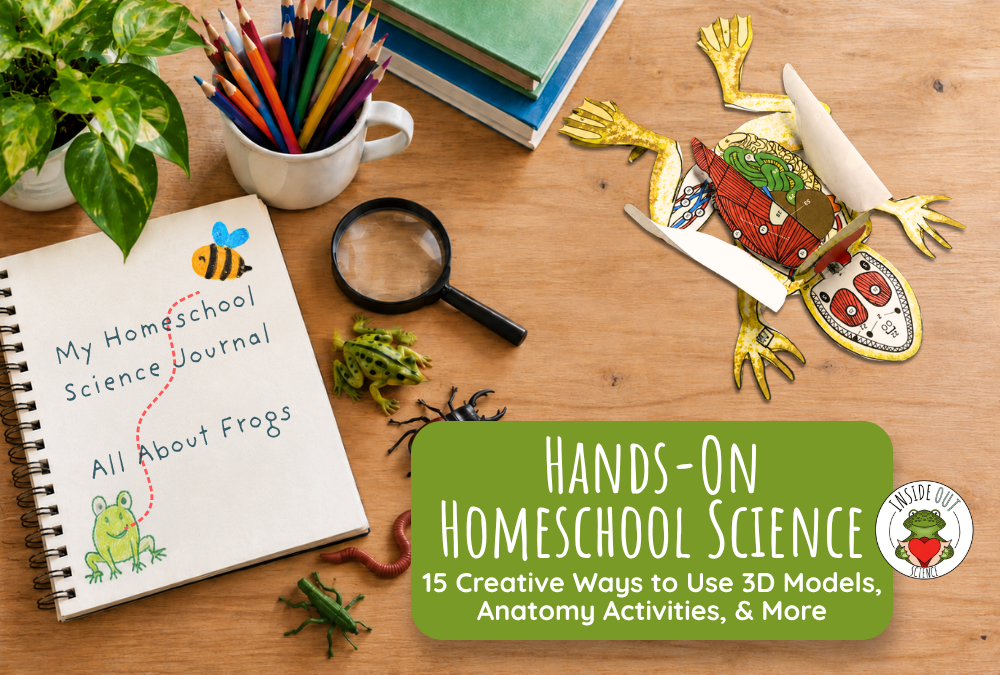
Let’s talk homeschool science. If you’re a homeschooling parent, chances are you’ve had that moment when you’ve looked at one of the subjects you’re teaching and thought, “yeah, sure… but how am I actually supposed to TEACH this?” This is especially true for science, where finding hands-on homeschool science activities that are affordable, engaging, and actually educational can feel like a challenge.
Maybe your curriculum calls for a dissection, but you’re not particularly excited about having a preserved frog hanging out in your camping cooler.
Perhaps your child can recite the parts of a cell but doesn’t really understand what any of those parts do, or where they are located, or why they are where they are… and how all of that is important to the function of the overall cell.
Or (lucky you) maybe you’re teaching a third grader and an eighth grader at the same time, and finding an activity that works for both feels a little like trying to herd cats.
Ah yes, herding cats… that last line really hits home for me. Writing this blog post brings me back to Covid days, when I had one kid starting Kindergarten and one kid in third grade, both at home and doing virtual school. I was managing all of their learning while simultaneously trying to run my business from my office (where one of their desks also lived). What a mess. My hats off to anyone who teaches their kids at home. It’s an honorable and incredibly tough job.
Hands-On Homeschool Science Doesn’t Have to Be Complicated!
And that’s why I’m here to tell you… You don’t need a fully equipped science lab, a biology degree, or a giant homeschool budget to make science meaningful. Sometimes, they happen at the kitchen table, surrounded by a bunch of colored pencils, scrounged for pantry items and a toddler at your side.. Am I right?
You just need opportunities for your kiddoss to explore, investigate, create, and connect what they’re learning to the world around them, and that’s where hands-on science comes in!
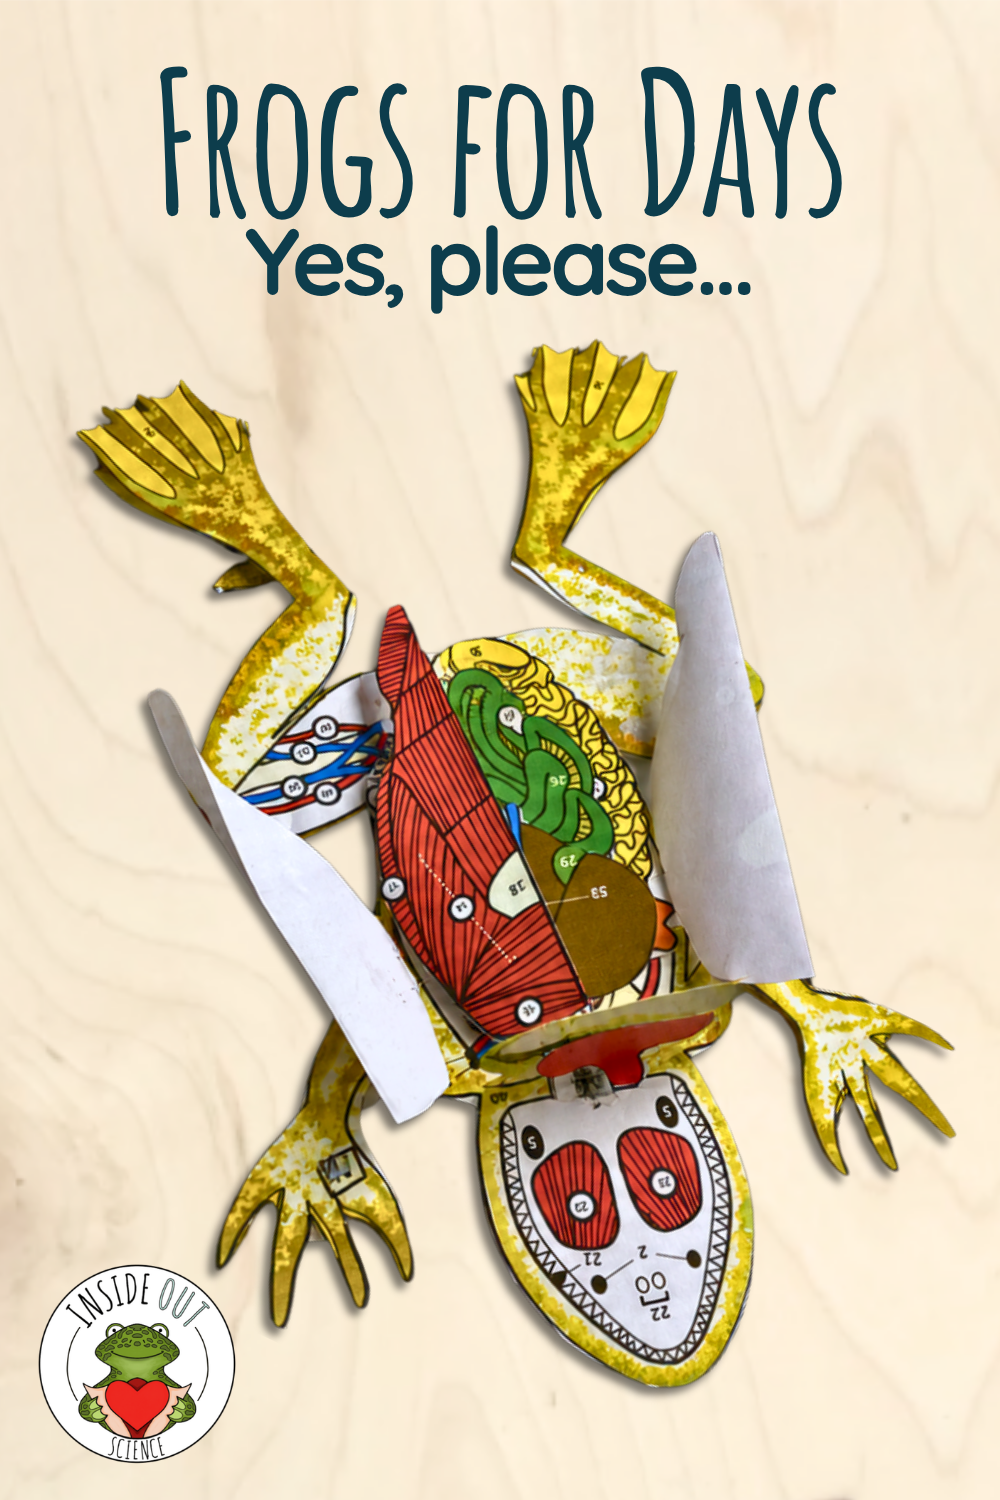
At Inside Out Science, I create reusable 3D paper dissection models, anatomy activities, and supplemental science resources designed to help learners understand science from the inside out. While many of these resources were originally developed for traditional classrooms, they’re equally at home in homeschool environments. And the best part? One resource can become the foundation for multiple lessons, projects, and learning experiences.
Let me show you how!
 Turn Your Kitchen Table Into an Anatomy Lab
Your kitchen table or counter doubles perfectly as a lab desk. Just sayin’…
With 3D paper dissection models, your homeschool kiddos can explore internal and external anatomy without the expense, smell, or mess of preserved specimens. Choose an organism, gather some colored pencils, scissors, and glue, and let the hands-on homeschool anatomy investigation begin! Students can color anatomical structures, assemble organs, identify body systems, and explore how different parts work together. And because the models are three-dimensional, learners get to see how structures are arranged inside an organism rather than simply memorizing labels on a flat diagram.
Try this: Before assembling a frog model, ask your child to predict where the heart, lungs, stomach, and intestines belong. After constructing the model, revisit those predictions. What surprised them? What connections can they make between an organ’s location and its function?
Make it work for different ages:
- Elementary: For younger kids, you’ll need to help with cutting and assembly. Then, have them identify major organs and describe their basic jobs. This dissection graphic organizer works great at helping little learners to organize information on their level.
- Middle school: These models were built with middle school and high school students in mind. Have them investigate how organs work together within body systems and how it relates to their own bodies.
- High school: Go further with your older students by having them compare anatomical structures, physiological functions, and evolutionary adaptations across species.
Looking for specimens to add to your anatomy curriculum? Explore Inside Out’s 3D paper dissection models where you’ll find frogs, earthworms, pigs, perch, sharks, starfish, squid and more!
 Create a Comparative Anatomy Investigation
Ever wonder what a frog, fish, earthworm, and human have in common?
You might be surprised that it’s quite a lot, actually! Comparative anatomy is not only a fantastic way to introduce evolution, adaptations, classification, and the relationship between structure and function to your homeschool science activities, it was also one of my favorite college classes, so you’ll find me talking about it in my blogs and see it woven into pretty much everything I make.
Try this: Instead of studying each organism independently, encourage your homeschool student to become an anatomical detective.
– Build two different organism models and compare their structures. Do both organisms have hearts? How do they breathe? How does their digestive system reflect what they eat? Which structures help them survive in their environments? Create a comparison chart for both speicmens – maybe you’re studying two aquatic speices like a frog and a perch. Investigate their respiratory systems, circulatory systems, and locomotion. Then discuss how each organism’s anatomy supports its lifestyle.
Extend the learning: Have your older students research homologous and analogous structures, evolutionary relationships, or the differences between open and closed circulatory systems.
This is also a great activity for siblings working at different grade levels. Everyone can investigate the same organisms while answering questions appropriate to their abilities.
 Hands-On Homeschool Cell Biology Your Kids Can Actually See
Cells are tiny. Like really tiny. And sometimes that makes them difficult for students to understand, especially if there isn’t a microscope present, and sometimes even if there is…
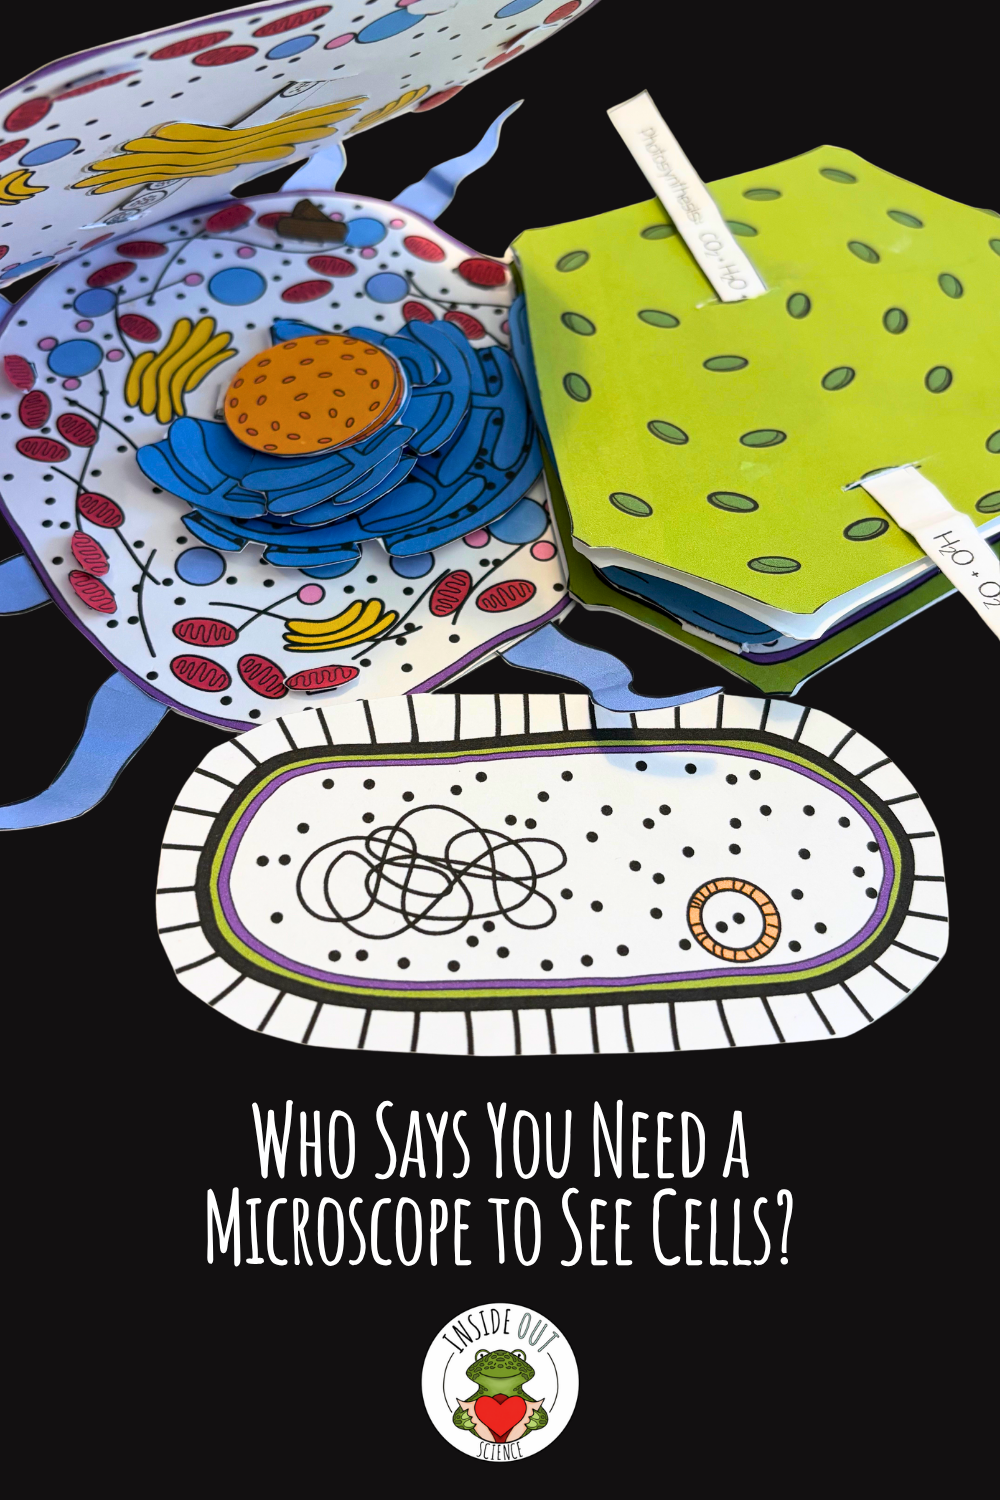
And sure, learners can memorize that mitochondria produce ATP and chloroplasts perform photosynthesis, but do they understand how organelles work together to keep a cell functioning? That’s where building a model might make a huge difference. When you add a 3D animal, plant, or bacterial cell model to your curriculum, your students can examine cellular structures, compare cell types, and connect each component to its function.
Try this: Have your child build an animal cell and a plant cell, then identify the structures they share and the ones that make them different. Ask questions like:
- Why do plant cells need chloroplasts but animal cells don’t?
- How does the cell membrane help maintain homeostasis?
- What would happen if the ribosomes stopped working?
- Why don’t bacterial cells have a nucleus or organelles?
Extend the learning: There are so many cell projects out there to extend your homeschool biology learning beyond just the lecture. Challenge your students to create a “Cell City” analogy in which each organelle represents a different part of a functioning community, or make an edible cell – this was always my favorite when I was in the classrom. One year, I had a student make a legit fondant cake plant cell (looking at all of you homeschool bakers out there). It was incredible!
Have an artistic learner? Let them design a comic strip starring their favorite organelle or turn their favorite organelle into a superhero! Yes, even the Golgi apparatus deserves its moment in the spotlight.
 Build a Science Unit Around One Organism
One of the biggest advantages of homeschooling is flexibility. You don’t have to study an organism for one lesson and immediately move on to something else. You can choose one animal and turn it into a multidisciplinary hands-on homeschool science investigation!
Let’s use a frog as an example. You could explore:
- Anatomy: Construct a 3D frog dissection model and compare structures to those in the human body.
- Life cycles: Investigate the metamorphosis of a frog from egg to tadpole to adult. Maybe even hatch a few nayive tadpoles to release into a nearby pond or stream.
- Ecology: Have students study the frog’s role in a food web.
- Adaptations: Examine how amphibians survive on land and in water or how they are able to survive over winter.
- Environmental science: Research how pollution and habitat loss affect amphibian populations.
- Math: Compare frog sizes or graph population data.
- Language arts: Write a field guide entry or research report on their findings.
Suddenly, one anatomy model has become the centerpiece of an entire unit study!
Try this: Have your child dedicate one section of a science notebook to one organism. Throughout the week, have them record observations, diagrams, research findings, questions, and conclusions. By the end, they’ll have created their own miniature field guide. Add more entries to it as you explore more specimen over time.
 Explore the Human Body Through Animal Anatomy
You don’t always need a human anatomy model to teach human body systems. In fact, examining other animals can help students better understand their own bodies. When students study the heart of a frog, the digestive system of a pig, or the respiratory structures of a fish, they begin recognizing patterns across living organisms. And those patterns ultimately lead to curiosity and insightful questions.
Why does a frog have a three-chambered heart while humans have four chambers? Why do fish use gills instead of lungs? How is it that mammalian digestive systems adapted to different diets?
Try this: After completing an animal model, have your student research the corresponding human body system. Create side-by-side diagrams and identify similarities and differences. Take is even further by asking what would happen if that organ were larger, smaller or differently structured.
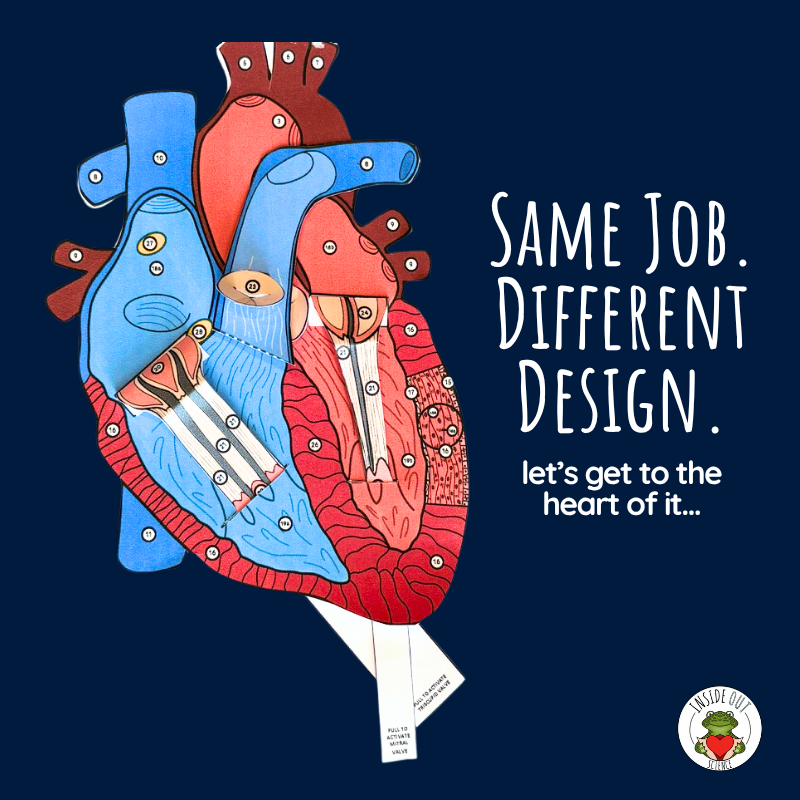
Extend the learning: Use a 3D heart model to trace blood flow through the heart, lungs, and body or assemble an eye model that has both human and sheep/cow configurations for a true comparative anatomy experience.. Challenge older students to explain how valves maintain one-way blood flow and why oxygenated and deoxygenated blood follow different pathways.
It’s a great way to turn isolated anatomy facts into a bigger understanding of how living systems function.
 Make Science Vocabulary Interactive
Sometimes science vocabulary can feel like learning an entirely new language, but it doesn’t have to. There are several ways to make science vocabulary accessible to your homeschool science learners experiencing scientific terminology for the first time. Vocabulary can become much more approachable when learners can connect unfamiliar words to something they can actually see and manipulate. Rather than simply memorizing definitions, using science word wall cards alongside models, diagrams, and investigations can enrich their understanding of terms and help them to make connections across words, especially when those cards have roots, suffixes and prefixes included.
Try this: Before beginning any anatomy activity, select five important vocabulary terms connected to the lesson. Ask your kiddo to predict their meanings, locate examples during the investigation, and explain each term in their own words afterward – a three-column chart would work great for this activity.
For younger learners, see if they can place the terms in order – for example in the digestive system, have them place the organs in order of when food encounters it first, or for cells, outside to inside the cell, starting with the cell membrane.
For older students, investigate Greek and Latin roots, prefixes, and suffixes and relate them to words they encounter everyday.
Bonus idea: Create a portable science word wall using a bulletin board, binder rings, or magnetic strips on the refrigerator. Who says word walls have to stay on classroom walls?
 Turn Science Into a Creative Engineering Challenge
Everyone has a preferred method of learning. Some kids do great with just reading about science. Others learn better by listening. And there are some that need to build it before it sticks. This section is for those kids…
Start with a biological structure and ask your kiddo to design something inspired by its function. For example:
- Investigate the shape and function of a bird’s wing and then design a paper glider based on the research.
- Explore the anatomy of fish and create a model that demonstrates buoyancy.
- Examine the exoskeleton of an arthropod and build a protective structure for an item using household materials.
- Study the human heart and then construct a simple model demonstrating one-way flow.
Try this: After assembling a bird anatomy model, challenge your child to design a paper wing that produces lift. Have them test different shapes, record flight time and distance results, and revise their designs to improve those results.
Now you’ve connected anatomy, physics, engineering, and the scientific method in one investigation.
 Use Science Choice Boards to Encourage Independence
Being able to tailor lessons to your kid’s interests is one of the best things about creating an interactive homeschool science experience, but coming up with different activities to support all of those amazing ideas can be exhausting. So why not add an arsenal of choices to your curriculum?
Science choice boards give learners a selection of meaningful activities while allowing them to take ownership of how they demonstrate their understanding. After studying an organism or body system, you can offer several choices for students to show what they know such as:
- Create a labeled scientific illustration.
- Write a diary entry from the perspective of an organ.
- Design a model demonstrating a biological process.
- Compare two organisms or structures.
- Research an adaptation and explain its survival advantage.
- Create a short presentation teaching someone else what you’ve learned.
Try this: Give your students different ways to engage with the material, offering create, analyze and apply activities for whatever lesson you’re teaching. Looking for a ready made option? This life science choice board has three options per life science topic (create, analyze and apply activities for cells, genetics, scientific method, ecology, human body, evolution and classification) with the overarching theme of anatomy at it’s core.
 Make Lab Safety Part of the Fun
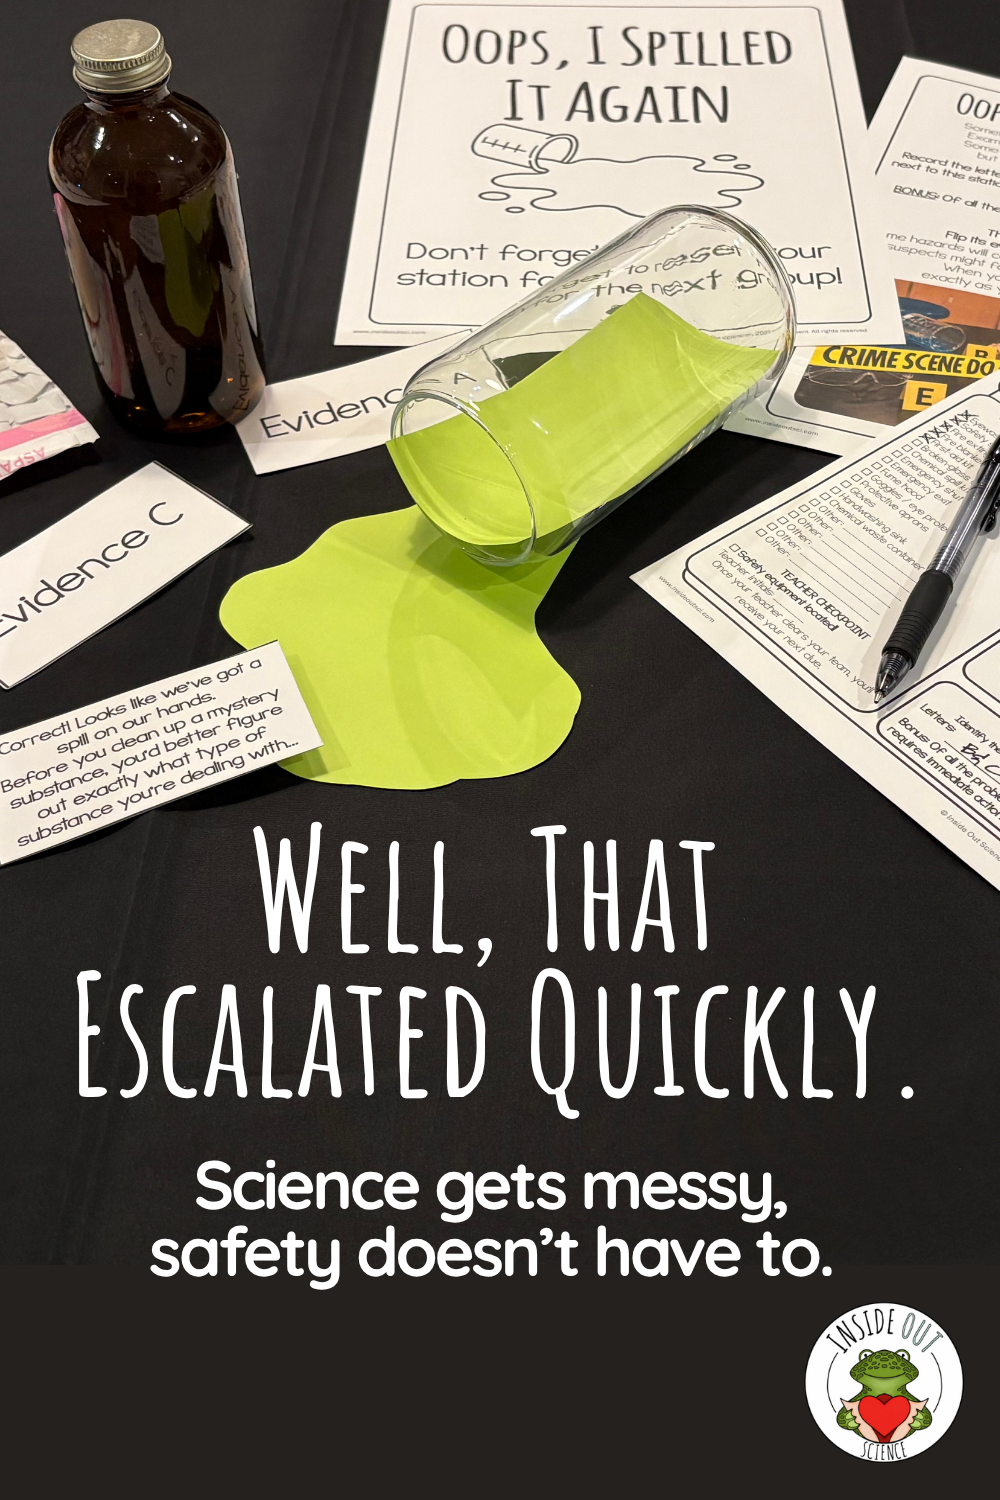
Just because you’re conducting science experiments at home doesn’t mean lab safety isn’t an important skill to learn. On the contrary, teaching safe science practices is especially important when your kitchen table doubles as your laboratory workspace. Before you start introducing experiments, take some time to cover personal protective equipment, laboratory tools, safe procedures, and emergency responses – broken glass and spills come to mind here.
And keep in mind that teaching lab safety doesn’t mean handing off a set of rules and expecting memorization. You can totally make lab safety learning interactive.
Try this: Set up a mock science investigation and ask your child to identify potential safety hazards. Make sure you create some areas of correct procedures and some that aren’t quite right. Then ask things like…
- Would they need goggles?
- Where should chemicals be stored?
- What should they do if something spills?
Another alternative? Create a safety scavenger hunt around your homeschool workspace and have your child identify things like where you keep the fire extinguisher, first aid kit, or other safety equipment.
Need to escape the boredom of lab safety rules? Try out Inside Out’s Lab Safety Escape Room – no locks required, and your kiddo can start from anywhere in the sequence – this activity introduces important safety concepts through eight interactive stations, including PPE, laboratory equipment, SDS information, safe procedures, and cleanup. Your kiddo gains their lab safety clearance and then signs off on a lab safety contract before beginning their investigations.
 Hands-On Homeschool Science For Your Younger Learners
A common misconception is that you have to wait until middle school to introduce anatomy. Younger children are naturally curious about living things, and early experiences with models can help develop observation, sequencing, and scientific reasoning skills. The key is to focus on age-appropriate concepts rather than overwhelming students with terminology.
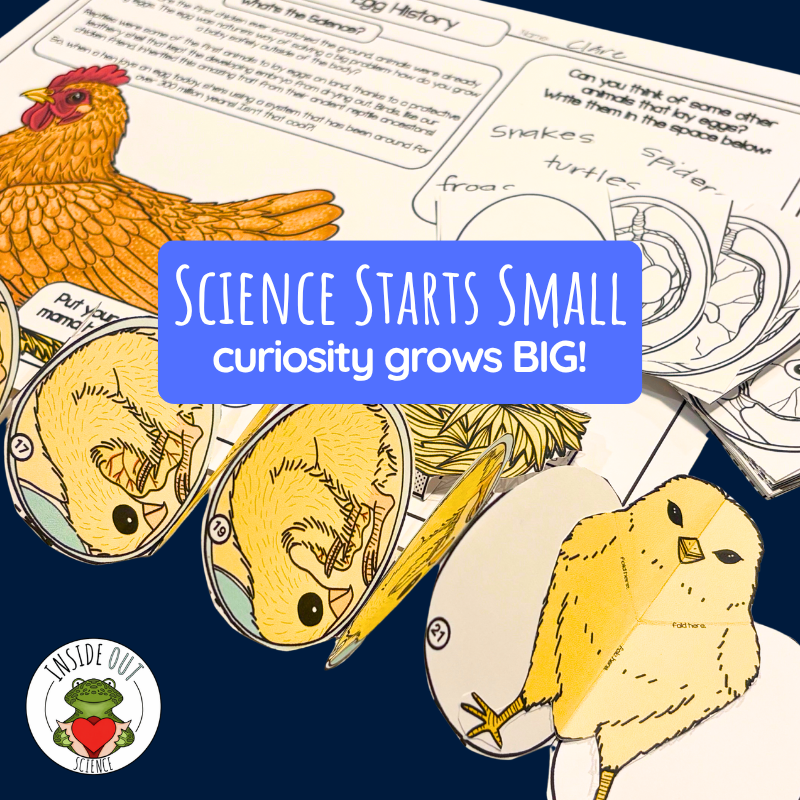
Try this: Explore the 21-day development of a chick embryo using illustrations, a timeline, and a life cycle model, introducing growth, development, reproduction, and the basic structures of living organisms.
Ask your child to sequence developmental stages and explain how the embryo changes over time.
You can extend the activity by comparing the development of chicks with turtles or humans.
For younger learners: Spend time focusing on sequencing, illustrations, and basic observations.
For older learners: Introduce embryology, reproductive adaptations, and the relationship between developmental structures and biological functions to bring higher levels of learning into the lessons.
 Use Models as Pre-Lab Practice Before a Real Dissection
If you’re planning to do a traditional dissection as part of your hands-on homeschool science curriculum, a 3D paper dissection model makes an excellent pre-dissection prep activity. Instead of throwing your kiddo to the wolves by introducing unfamiliar anatomy while they’re simultaneously learning to handle dissection tools, give them an opportunity to explore the structures beforehand. They can identify organs, examine their arrangement, and become familiar with anatomical terminology before working with a preserved specimen, whihc makes the actual disseciton more focused, purposeful, and helps your student feel more confident.
Try this: Have your homeschooler complete a paper dissection model first. Then ask them to create three questions about the organism’s anatomy that they’d like to investigate during the specimen dissection. Afterward, they can compare the model with the actual specimen and revist their questions.
- Which structures were easier to identify?
- Which were more challenging?
- What did they notice about anatomical variation?
And if your family prefers not to use preserved specimens? That’s absolutely okay, too. Paper models are the perfect humane alternative for exploring anatomical relationships without requiring animal dissection.
 Create a Homeschool Science Portfolio
When I was in the classroom, one of my favorite things was when we made interactive notebooks. Students producing tangible evidence of what they’ve learned, taking accountability for their learning experience, and then holding on to their notebooks well into high school, only to return years later to tell me that their notebooks were a “life saver” in their biology course – it was truly the best and I personally think it would be a missed opportunity if you didn’t do the same. You can put everything in your science portfolios – model or specimen photographs, labeled diagrams, research notes, written explanations, lab reports, and student reflections. Over time, your child will build a record of their scientific growth that they will carry with them long beyond your kitchen counter.
Try this: At the end of each investigation, insert a page that asks your child to answer these three questions:
- What did I learn?
- What surprised me?
- What question(s) do I still have?
These simple reflections encourage metacognition and help students recognize that science is an ongoing process of discovery.
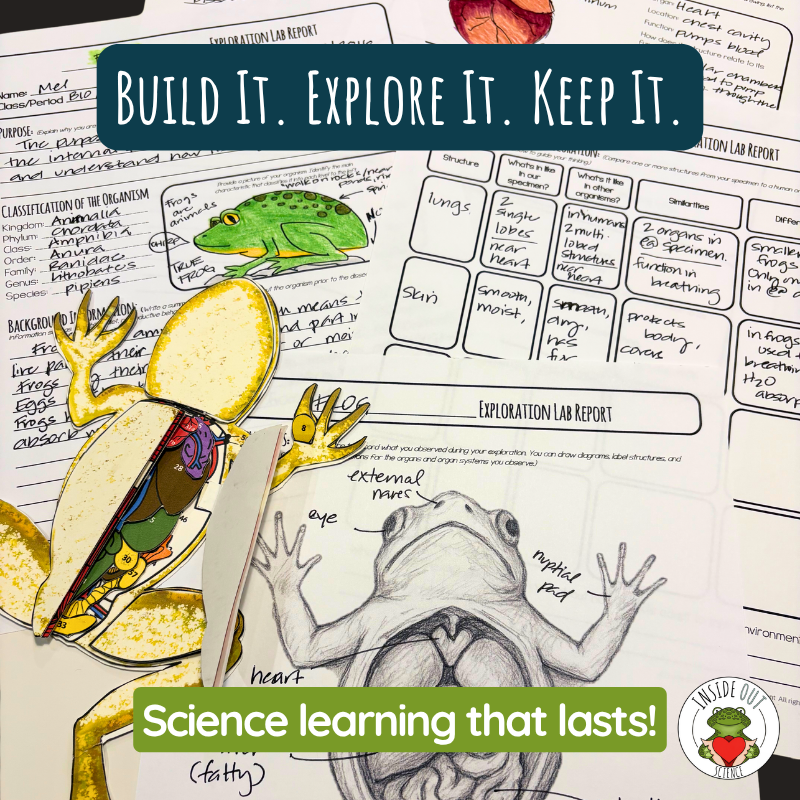
Want to take your science portfolio a step further? The Smithsonian Learning Lab offers free educational resources, including images, videos, and interactive collections that can help your homeschool students explore scientific concepts beyond their own investigations. Encourage your kiddos to find a resource related to something they’ve studied, then add a new observation, comparison, or research question to their portfolios.
 Turn Science Models Into Review Games
Finished 3D model construction? Use it as a reusable review tool! Set up a lab practical or just cover anatomical labels and challenge them to identify structures. Give your kiddo clues describing organ functions and ask them to locate the corresponding organ. Or create a timed challenge in which your student explains as many structures as possible.
Try this: In the same vein as the old gameshow “Name That Tune” (am I dating myself here? 🤣🤣🤣), play “Name That Organ!” Give your student clues such as:
- “I’m responsible for producing bile.”
- “I help exchange oxygen and carbon dioxide.”
- “I absorb most nutrients from digested food.”
Have them identify the organ and locate it on their model, or if you’re not using a model, on themselves!
For older students, require an explanation of how the specific organ contributes to homeostasis. That’ll make their brain work!
Have siblings at home? Turn it into a cooperative challenge where each child contributes information appropriate to their level.
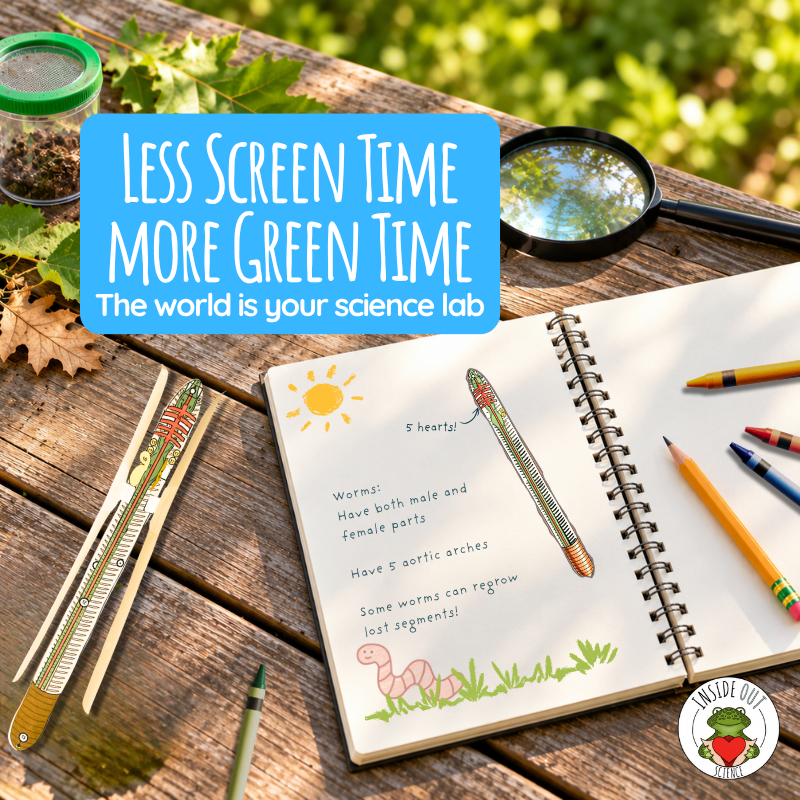
 Take Your Science Lessons Outside
Just because it’s called “homeschool”, doesn’t mean that every science lesson needs to happen indoors. In fact, many of the concepts explored through anatomy models become even more meaningful when students observe organisms in their natural environments. So…
… After studying an earthworm, head outside and investigate soil habitats.
… After exploring insect anatomy, observe arthropods in your backyard.
… After completing a bird model, go birdwatching and look for adaptations related to feeding, movement, and habitat.
Try this: Add another section to that science portfolio by creating a backyard biodiversity journal. Have your child sketch organisms, record observations, classify living things, and develop questions about their structures and behaviors. Encourage them to connect what they’ve learned through models to the organisms they encounter outdoors.
Want to take your backyard biodiversity journal a step further? Try iNaturalist, where your family can document organisms you discover and learn more about the biodiversity in your own backyard.
And it’s a good idea to remind your kiddos – observation doesn’t have to involve collecting or disturbing wildlife. Sometimes the best science happens when we simply sit quietly and pay attention.
 Create a Multi-Age Homeschool Science Day
Sometimes you don’t have the luxury of teaching just one kid, one grade level at a time. Rather than prepping completely separate science lessons, choose one central topic and adjust the depth of learning for each child.
Let’s say you’re studying the heart.
Everyone begins with a discussion about why living organisms need circulatory systems. Then each learner tackles an age-appropriate challenge. For example…
Elementary learners: Identify the heart, maybe the main structures (atrium, ventricles) and then explain its basic function.
Middle school learners: Have your kiddo build a heart model and trace the pathway of blood through its chambers.
High school learners: Have your older kids investigate pulmonary and systemic circulation, valve function, and the relationship between heart structure and cardiovascular efficiency.
Bring everyone together at the end to share what they’ve discovered.
Older students can practice explaining complex concepts in accessible language, while younger learners get exposure to ideas they’ll revisit later.
And you? You get to teach one connected science lesson instead of three completely different ones. Boom.
Let’s do this: Build a Week+ of Hands-On Homeschool Science Around One Model
Let’s check out how all of this might look in a real homeschool schedule. Here’s an example of how the Frog 3D paper dissection model can become a full week of science learning.
Monday: Meet Your Frog!
Areas of focus: Classification, adaptations, external anatomy
Start the week by introducing your kiddo to the fascinating world of amphibians. Read all about frogs and their habitats, life cycles, and adaptations, discussing what makes an amphibian different from a reptile, mammal, or fish. Then, take a closer look at a frog’s external anatomy. Why do frogs have powerful hind legs? What purpose do their webbed feet serve? Why are their eyes positioned near the top of their heads? Why do they have smooth, moist skin?
Try this: Have your child draw a frog and label at least five external structures. Next to each label, write a sentence explaining how that structure helps the frog survive.
Extend the learning: You can take this further by researching a frog species native to your state and identifying three adaptations that help it thrive in its environment.
Tuesday & Wednesday: Let’s Get Inside!
Areas of focus: Internal anatomy and structure-function relationships
Time to build! Using your 3D frog dissection model, have your student color, cut, and assemble the model while following along with the accompanying reading and guided presentation. As each organ is added, engage curiosity by discussing its function and how it works with other structures. Rather than focusing entirely on memorizing organ names, encourage your child to think about the bigger picture. Why is the stomach connected to the intestines? How do the heart and lungs work together? What happens to food after a frog swallows it?
Try this: Before placing each organ inside the model, ask your child to predict where it belongs and explain why. Students may also notice that common color themes occur among organs – ask them why (the answer is that they all belong to the same organ system!).
Extend the learning: Choose one body system, such as the digestive system, and trace the pathway of food through the frog’s body. Create a flowchart showing each major structure and its role.
Thursday: Frog vs. Human!
Areas of focus: Comparative anatomy and body systems
Now that your homeschooler understands the basic structures inside a frog, it’s time to make some connections. Let’s spend today comparing the frog’s anatomy with that of the human body. Start with the organs they share, such as the heart, lungs, stomach, liver, and intestines, investigating commonalities and some important differences. For example, frogs have three-chambered hearts, while humans have four-chambered hearts. Adult frogs can also exchange gases through their skin, something humans cannot do.
Try this: Create a two-column chart or a Venn diagram labeled “Frog” and “Human.” Compare the similarities and differences in how each organism breathes, circulates blood, digests food, reproduces and moves.
Extend the learning: Ask your child to explain how one anatomical difference relates to the environment or lifestyle of each organism. For younger learners, this might be a simple illustrated comparison. Older students can investigate the physiological reasons behind these differences.
Friday: Think Like a Scientist!
Focus: Critical thinking, research, and application
Today, let’s take everything we’ve learned and put it to work! Give your homeschooler a real-world question to investigate:
“What might happen to a frog if its habitat became increasingly polluted?”
Start by discussing how frogs interact with their environments. Their permeable skin makes them particularly vulnerable to certain environmental contaminants, and changes in water quality can affect their survival.
Then ask your child to choose one of the following activities:
- Create: Design an informational poster explaining how frogs depend on healthy aquatic and terrestrial habitats. Include at least three anatomical or physiological adaptations to back up their claims.
- Analyze: Research how pollution, habitat loss, or climate change affects amphibian populations. Identify a specific threat and explain how it may impact frog survival.
- Apply: Imagine you’re designing a frog-friendly backyard habitat. Draw your design and explain how it would provide food, water, shelter, and protection from environmental hazards.
Extend the learning: Have older students locate a scientific article or conservation report about amphibian population declines and summarize the evidence supporting its conclusions.
When They’re Ready: Show What You Know!
Focus: Review, scientific communication, and assessment
Time to wrap up the unit! Bring out the completed frog model and use it for a little anatomy review. Cover the numbers or point to individual organs and ask your child to identify each structure and describe its function. Then, instead of giving a traditional test, have them demonstrate their understanding through a hands-on challenge.
Try this: Let the student become the teacher! Have them give you a five-minute guided tour of their frog model, explaining at least five organs, how two body systems work together, and one adaptation that helps frogs survive. Encourage them to use scientific vocabulary, but allow them to explain concepts in their own words.
And don’t forget… ask your homeschooler to write or discuss three things they learned, two things they found interesting, and one question they’d still like to investigate and add it to their science portfolio.
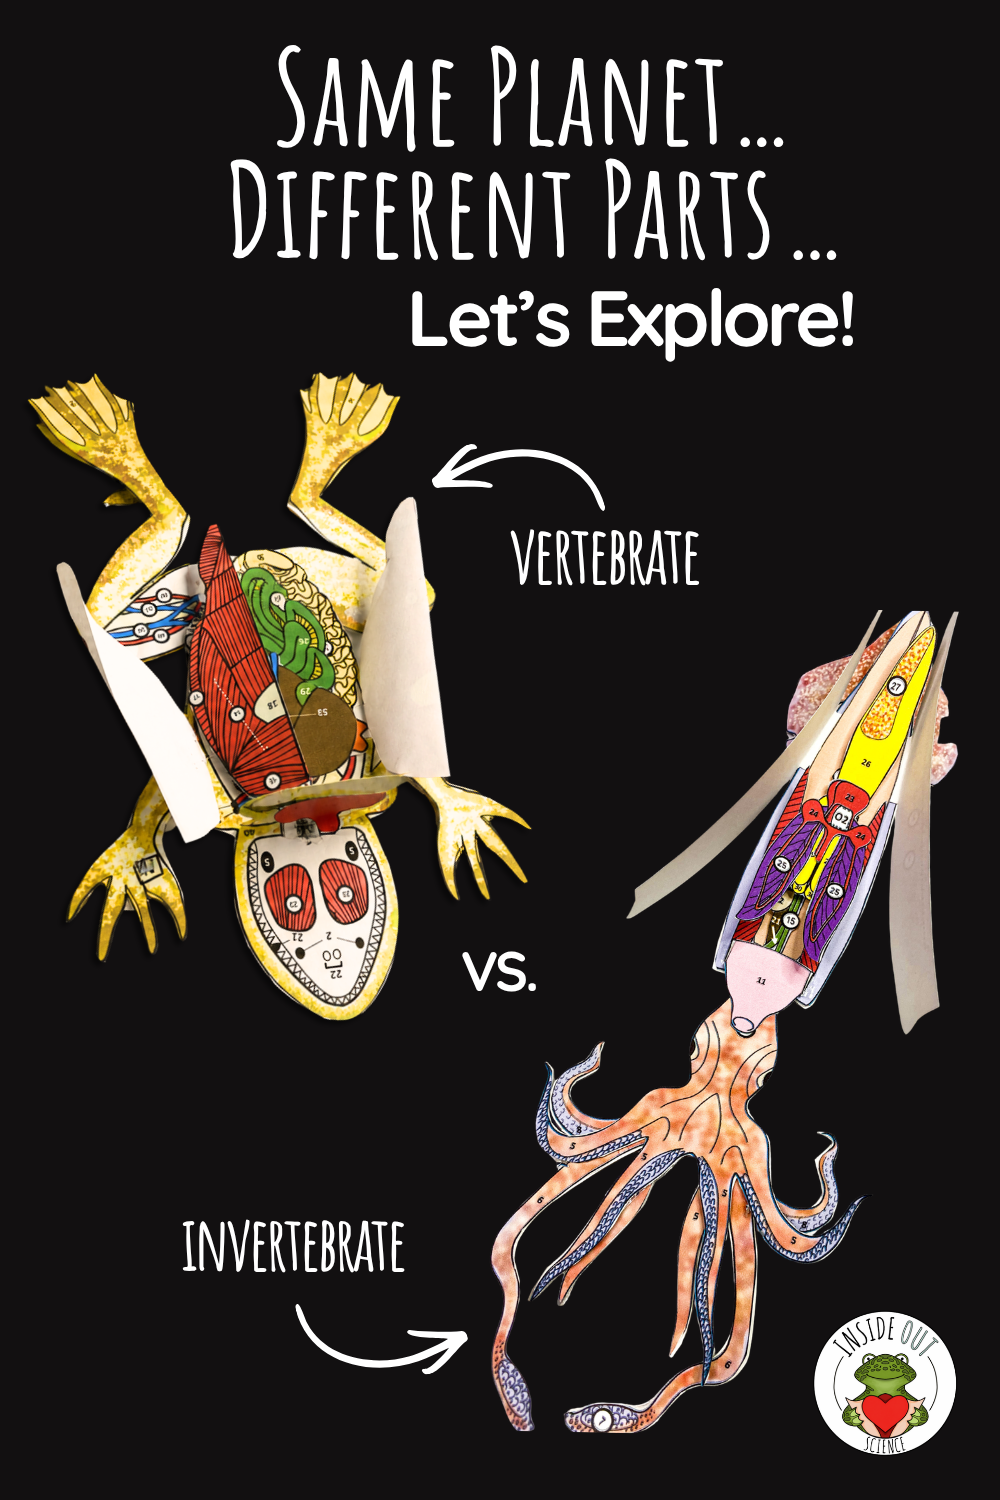
Want to take it even further? Add a nature walk to search for amphibian habitats, research frogs native to your area, or compare your frog model with an invertebrate. The goal isn’t to rush through a checklist of activities. It’s to give your child time to explore, ask questions, make connections, and develop a deeper understanding of the science behind the model.
Ready to Bring Hands-On Science Into Your Homeschool?
Grab those colored pencils, clear a little space on the table, and get ready to explore! Come see the Inside Out Science collection of reusable 3D paper dissection models, anatomy activities, and supplemental science resources designed for curious learners of all ages.
Using ESA or EFA funds for your homeschool? Did you know Inside Out Science is an approved vendor for a growing number of state education savings and scholarship programs? Click here to see if Inside Out is in your state!
